Ploegsteert Wood is about 9 miles south of Ypres. The area saw heavy fighting in 1914 as the Germans tried to take Ypres in their drive to the coast. The British line held, but Ypres formed a dangerous salient in their lines, with the Germans holding the dominating high ground. Ploegsteert Wood (map 1) became a quite sector after this initial fighting, with the subsequent fierce fighting for Ypres taking part further north in 1915 and 1917. The Germans captured the wood in April 1918 (map 2) during the battle of the Flanders Hills, with the British re-taking the wood at the end of September during the Advance to Victory. Within the wood there still can be found a number of shelters and machine gun pillboxes (map 3), the subject of this post.


PILLBOXES OR 'FORTS'
Along Hunters Avenue there can be found six machine gun pillboxes (a seventh can be found on the west side of the wood, but we did not visit this one). A breastwork ran along Hunter's Avenue, with small 'forts' - i.e. machine gun pillboxes - sited along its length. Their purpose was to sweep the wood with fire and prevent any enemy approach along the woodland rides. They were built in 1916, and are remarkably strong, solid and well built constructions: it was not only the Germans who built concrete pillboxes in the First War! A variety of shuttering was used, including corrugated steel sheets, wood and sandbags. They had one or two machine gun embrasures and some also have an observation or rifle embrasure. On one of the pillboxes, the embrasure is stepped, a rare feature in WW1 pillboxes.On the inside, there is a slot below each machine gun embrasure, presumably to take one leg of the Vickers tripod. In a couple of the pillboxes, with clean interiors, it is clear that the tripod leg have to have been at a horizontal level, the other two legs splayed out normally. Presumably the tripod would have been weighed down with sandbags. In the interior of these pillboxes is a brick built wall. This may have had two purposes - a seat for the gunner and also to keep water from running into the interior. In the other pillboxes it was not possible to determine the level of the floor. Some have a brick wall across the entrance to the pillbox, clearly to keep out water.
The following set of images are of the pillboxes, from north to south.
Mount Everest 'forts'
Two pillboxes sited adjacent to each other. The external shuttering used on both was sandbags, which gives them a rough appearance, but they are stout constructions.


Map 1: Line as it stabilized at end of 1914 (Ploegsteert is towards the bottom of the map)

Map 2: German April 1918 offensive

Map 3: Pillboxes and shelters plotted on a 1917 trench map of the wood.
PILLBOXES OR 'FORTS'
Along Hunters Avenue there can be found six machine gun pillboxes (a seventh can be found on the west side of the wood, but we did not visit this one). A breastwork ran along Hunter's Avenue, with small 'forts' - i.e. machine gun pillboxes - sited along its length. Their purpose was to sweep the wood with fire and prevent any enemy approach along the woodland rides. They were built in 1916, and are remarkably strong, solid and well built constructions: it was not only the Germans who built concrete pillboxes in the First War! A variety of shuttering was used, including corrugated steel sheets, wood and sandbags. They had one or two machine gun embrasures and some also have an observation or rifle embrasure. On one of the pillboxes, the embrasure is stepped, a rare feature in WW1 pillboxes.On the inside, there is a slot below each machine gun embrasure, presumably to take one leg of the Vickers tripod. In a couple of the pillboxes, with clean interiors, it is clear that the tripod leg have to have been at a horizontal level, the other two legs splayed out normally. Presumably the tripod would have been weighed down with sandbags. In the interior of these pillboxes is a brick built wall. This may have had two purposes - a seat for the gunner and also to keep water from running into the interior. In the other pillboxes it was not possible to determine the level of the floor. Some have a brick wall across the entrance to the pillbox, clearly to keep out water.
The following set of images are of the pillboxes, from north to south.
Mount Everest 'forts'
Two pillboxes sited adjacent to each other. The external shuttering used on both was sandbags, which gives them a rough appearance, but they are stout constructions.


Above: The Mount Everest 'forts'
1st image: One of the pillboxes
2nd image: It's neighbor
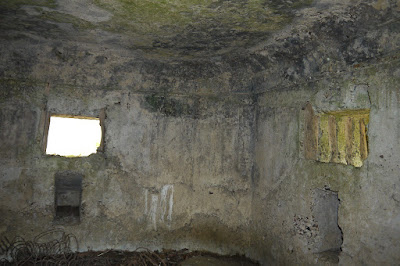
3rd and 4th images: The interior of both pillboxes, showing two machine gun embrasures
5th image: Showing both pillboxes
6th image: entrance to one of the pillboxes. The brick wall in this case is surely to keep out water.
'Fort'
Not sure of the name of this fort. My favorite of the group. External shuttering probably wood. It has a stepped embrasure. A fault line is clearly visible between the pouring of the walls and the roof.


Above: Next 'fort' south from Mount Everest 'forts'. Note stepped embrasure and fault between poring of walls and roof.
Eel Pie 'fort'
The name Eel Pie comes from the name of a light trench railway running along the adjacent track - the Eel Pie Line. Constructed using both wood and corrugated steel sheet shuttering. Again, a clearly visible fault between the pouring of the walls and roof can be seen. This one has a smaller second observation/rifle embrasure.


Above: Eel Pie 'fort'. Note second, smaller embrasure (image no.5) and corrugated iron sheet shuttering for the rear wall (image no.6).
Eccles 'fort'


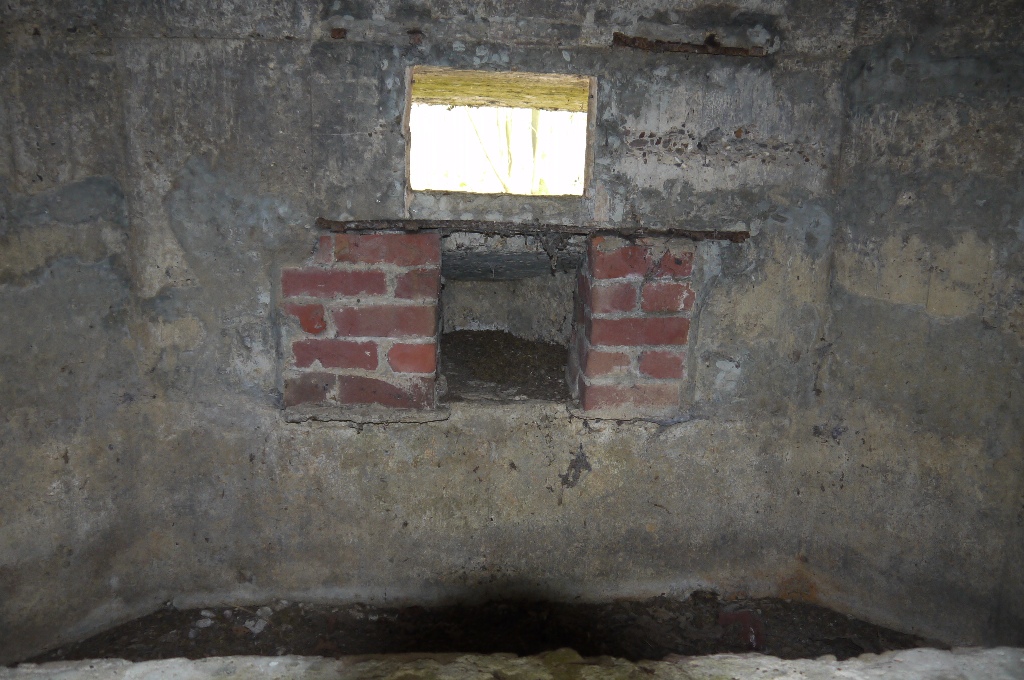


Above: Eccles 'fort'. Note the slot below the embrasure (forth image) is quite a bit above floor level. Also note the brick wall running across the extreme bottom of the image, just the right height for a gunner to sit on.
'Fort'
Not sure of the name of this fort. The most southerly of the 'forts' running along the length of Hunters Avenue.


Note the blocked embrasure (second image) - why it has been blocked or the purpose of the small aperture I'm not sure.
SHELTERS
Lewisham Lodge
A not very substantial shelter that has been destroyed by shellfire. The exterior shuttering is corrugated steel iron sheets while the imprint of sandbags are clearly visible on the interior walls, suggesting it was constructed over an existing sandbagged shelter.


Above: Lewisham Lodge. Note imprint of sandbags on interior wall (top image) and the use of corrugated iron sheets for the external shuttering (bottom image).
Blighty Hall
A regimental aid post. The inscription 'Blighty Hall' can be clearly seen above the entrance. A simple shelter constructed using external shuttering of sandbags and internal shuttering of more substantial 'elephant iron' sheets. It is probable the sandbags would have been left in situ after pouring to give further protection.


Above: Blighty Hall. Note inscription on lintel (first image) and imprint of sandbagged shuttering (forth image).
Rifle House
The entrance to a partly sunken shelter is still visible today at the site of Rifle House. The name originates from timber huts built by the 1st Rifle Brigade in in 1914.

Shelter along northern edge of the wood
Another partially destroyed and not very substantial shelter consisting of 'elephant iron' and concrete, in the vicinity of Toronto Avenue. Probably connected with a nearby light trench railway called the Prowse Boyd Line and later the Vancouver Railway.

Comments
Post a Comment