Pages

Tuesday, 27 September 2011

Carnaby Airfield - East Yorkshire

On my recent trips upto Yorkshire, Carnaby Airfield was one site I visited.  Some more posts from Yorkshire to follow as well as some posts on the Corps Line in Suffolk.

Work on constructing Carnaby aerodrome was started in the early years of the War. It was opened in 1944- the following text is from www.airfields-in-yorkshire.co.uk:

" Carnaby opened in March 1944 as an emergency landing ground for Bomber Command to enable crippled bombers a safe place to land near the coast.

Carnaby Moor, near Bridlington was ideal. A single runway almost 2 miles long and over 700ft wide was constructed. The airfield had to be available in any weather and as well as an anti skid bitumen surface for the runway, FIDO (Fog Investigation Dispersal Operation), a device of petrol burners used to burn off fog, was installed. The system used lighted petrol to lift the fog from the airfield thus enabling aircraft to land safely.

Carnaby's wartime service was short but in it's operational life over 1400 emergency landings were recorded.

The base closed in March 1946 and was left to the elements until the outbreak of the Korean War, where the RAF increased its pilot training programme and Carnaby opened again in 1953 becoming a relief landing ground for Driffield.

Again, life to Carnaby was short lived and the base closed in 1954.

It wasn't until 1958 that Carnaby became operational again, this time deemed as a Thor missile site. 150 squadron was reformed and designated the Thor unit.

1963 saw the base close for the last time and the site was left to decay. In 1972 the site was brought by Bridlington Council and was turned into an industrial estate, as it is today. The main runway is now the road through the estate, the only real clue to its existence as an airfield. Very little remains today but you can still see parts of the taxiways. "


Above: Carnaby Industrial Estate on the site of Carnaby Airfield.

FIDO consisted of injecting petrol through pressurised pipes either side of the runway, which was then fired by burners set at certain intervals along the pipeline. It was estimated that visibility could be increased by 200 to 2,000 feet. Only three emergency airfields were constructed during the War, all equipped with FIDO (Woodbridge in Suffolk was also an emergency runway). FIDO was also installed at 12 other airfields which included Tuddenham in Suffolk.

FIDO was utilised on several occasions at Carnaby, which resulted in rumours in local villages that the runways had caught fire! During Dec 1944 about 100 American Fortresses  landed and parked up in a double row alongside the airfield, unable to land at their East Anglian airfields due to fog. They all took off safely the following day.


Above: Artists impression of FIDO in operation

My mother remembers seeing missiles pointing out to sea while travelling to work on the train from Bridlington to Beverley. As Thor's were stored horizontally  on transporter-erector trailers under cover of a retractable missile shelter I assume these must have been Bloodhound surface to air missiles sited to protect the Thor's - one major weakness of Thor was the launch sequence took 15 minutes making them vulnerable to attack before they could be launched.


Above: Thor ICBM (photographed at nearby Driffield) and Bloodhound SAM

On my visit I came across three remaining buildings although I don't know from which part of the airfields history they date from.  Some standings/taxiways and remains of manholes/pipes in nearby fields can also be seen. Are the pipes/manholes the remains of FIDO?? 


Image 1 - 4: Remains of building, presumably a workshop.
Image 5 & 6: Remains of second building still surviving.
Image 7: Remains of the third building that can still be seen.
Image 8: Surviving standing / taxiway
Image 9 & 10: Pipes/ manholes in nearby fields - remains of FIDO?


Sunday, 11 September 2011

Atwick, East Yorkshire

During my recent visit up to Yorkshire, I visited Atwick. As with much of the Yorkshire coast south of Bridlington, it is eroding fast here, and as with many sites along this stretch of coast, the front line defences have disappeared. The pillboxes surviving today were part of the rear line of defences.

It is easy to see why this stretch of coast was heavily defended - as a sketch I came across at TNA shows - the whole beach from Bridlington to Spurn was suitable for landings, the cliffs would have easily been passable to German infantry, with suitable gaps along the coast for tanks.


Above: A sketch of the beaches along the Yorkshire Coast (TNA) - the red areas are  suitable for landings, the green areas not - and below a view of the beach at Atwick looking north towards Bridlington and Flamborough Head.

The surviving pillboxes are all of the Northern Command lozenge design. One which has its entrance sealed  has all its wooden weapons-shelves in place. Also surviving in the area are two partially sunken posts, presumably these would be Command Posts (platoon or company HQ's?).  They are not identical, one being larger with two rooms, the other smaller with one room only. They are the only ones I've seen along this stretch of coast and I don't know if others exist. They are not shell proof with additional protection given by covering with earth as images 7 and 8 below clearly show.

Atwick 'gap' was blocked with anti-tank cubes but the only remains of these now have been heaped up to act as sea defences.

Image 1-4: Lozenge pillbox with wooden weapons shelves still intact.
Images 5-6: The smaller of the two sunken posts, with pillbox in background (image 6)
Images 7-8: The larger of the sunken posts, with lozenge pillbox in background.
Image 9: The pillbox near the second sunken post.
Image 10: Remains of tank blocks, Atwick gap, now part of the sea defences.


Sunday, 4 September 2011

Eastern Command Line: North of Bury St Edmunds

Recently back from a trip up to Yorkshire visiting family (so expect some more posts from Yorkshire!). Anyway on the way up I stopped off just north of Bury St Edmund's to take a quick look at some pillboxes on the Eastern Command Line. Not really  time for a detailed search but a quick recce of the ground for reference to a future visit. That saying, still some nice pillboxes seen. Here the anti-tank obstacle is the River Lark, which the Command Line followed from Bury St Edmond's until it met the GHQ Stop Line in Camridgeshire at the River Great Ouse. The pillboxes are all of the Eastern Command CRE design - 1094, 1113 and 1116. Note the Serial No reference referred to for the pillboxes etc is the reference  given in the original Engineers plans for the Command Line.

 Above: River Lark - the anti-tank obstacle

A couple of the pillboxes are of interest. One has metal rods fixed above the embrasure - for what purpose I don't know and it is the only pillbox I have seen this on so far. 


Above: Pillbox to design CRE 1094, Serial No N28. Note metal rods above embrasure.

Another has some of the corrugated iron sheets used for the roof shuttering still in place. The condition of the sheets is quite remarkable. I also liked the touch of using rounded brick shuttering for the weapons-shelf of the embrasures - showing a nice touch to detail by whoever constructed the pillbox! 


Above: Pillbox to design CRE 1113. Note corrugated iron sheet used for roof shuttering still in place and the rounded bricks used for the  shuttering  of the weapons-shelf. Serial No N26.

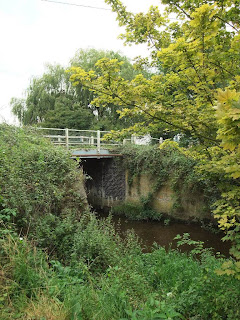
All key crossings over the Command Line were covered with anti-tank guns. The 6pdr anti-tank gun pillbox which covers Flempton Bridge is now almost buried in spoil with a boat perched on top!


Above: Crossing over Command Line Serial No 9 (Flempton Staunch) with 6 pdr pillbox Serial No NA5 (to design CRE 1116) now covered in spoil with a boat on top!! This pillbox covered the crossing.

The final pics below show some of the other pillboxes in the area I managed to get to.

Image 1-3: Pillbox to design CRE1113 but not the AA version. It has a  blast wall (instead of a low level protected entrance) which appears to have been joined to one side of the pillbox. Serial No N33a.
Image 4&5: Pillbox to design CRE1113 agian not the AA version. Corrugated Iron sheets have clearly been used for the roof shuttering. Serial No N24.
Image 5&6: Pillbox to design CRE1113 - the AA version with a central AA well. Serial No N29. Last photo shows the River lark with pillbox in distance.